Table Of Contents
- VKeyboard
- Modes
- Layouts
- Request Keyboard
VKeyboardVKeyboard.available_layoutsVKeyboard.backgroundVKeyboard.background_borderVKeyboard.background_colorVKeyboard.background_disabledVKeyboard.callbackVKeyboard.collide_margin()VKeyboard.dockedVKeyboard.font_sizeVKeyboard.key_background_colorVKeyboard.key_background_downVKeyboard.key_background_normalVKeyboard.key_borderVKeyboard.key_disabled_background_normalVKeyboard.key_marginVKeyboard.layoutVKeyboard.layout_pathVKeyboard.margin_hintVKeyboard.on_touch_down()VKeyboard.on_touch_up()VKeyboard.refresh()VKeyboard.setup_mode()VKeyboard.setup_mode_dock()VKeyboard.setup_mode_free()VKeyboard.target
VKeyboard
Added in version 1.0.8.
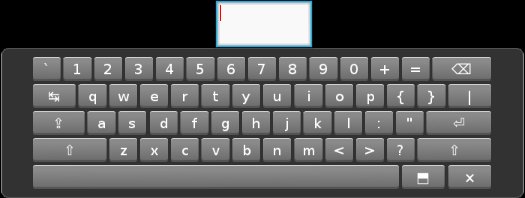
VKeyboard is an onscreen keyboard for Kivy. Its operation is intended to be transparent to the user. Using the widget directly is NOT recommended. Read the section Request keyboard first.
Modes
This virtual keyboard has a docked and free mode:
docked mode (
VKeyboard.docked= True) Generally used when only one person is using the computer, like a tablet or personal computer etc.free mode: (
VKeyboard.docked= False) Mostly for multitouch surfaces. This mode allows multiple virtual keyboards to be used on the screen.
If the docked mode changes, you need to manually call
VKeyboard.setup_mode() otherwise the change will have no impact.
During that call, the VKeyboard, implemented on top of a
Scatter, will change the
behavior of the scatter and position the keyboard near the target (if target
and docked mode is set).
Layouts
The virtual keyboard is able to load a custom layout. If you create a new
layout and put the JSON in <kivy_data_dir>/keyboards/<layoutid>.json,
you can load it by setting VKeyboard.layout to your layoutid.
The JSON must be structured like this:
{
    "title": "Title of your layout",
    "description": "Description of your layout",
    "cols": 15,
    "rows": 5,

    ...
}
Then, you need to describe the keys in each row, for either a “normal”, “shift” or a “special” (added in version 1.9.0) mode. Keys for this row data must be named normal_<row>, shift_<row> and special_<row>. Replace row with the row number. Inside each row, you will describe the key. A key is a 4 element list in the format:
[ <text displayed on the keyboard>, <text to put when the key is pressed>,
  <text that represents the keycode>, <size of cols> ]
Here are example keys:
# f key
["f", "f", "f", 1]
# capslock
["↹", "     ", "tab", 1.5]
Finally, complete the JSON:
{
    ...
    "normal_1": [
        ["`", "`", "`", 1],    ["1", "1", "1", 1],    ["2", "2", "2", 1],
        ["3", "3", "3", 1],    ["4", "4", "4", 1],    ["5", "5", "5", 1],
        ["6", "6", "6", 1],    ["7", "7", "7", 1],    ["8", "8", "8", 1],
        ["9", "9", "9", 1],    ["0", "0", "0", 1],    ["+", "+", "+", 1],
        ["=", "=", "=", 1],    ["⌫", null, "backspace", 2]
    ],

    "shift_1": [ ... ],
    "normal_2": [ ... ],
    "special_2": [ ... ],
    ...
}
Request Keyboard
The instantiation of the virtual keyboard is controlled by the configuration. Check keyboard_mode and keyboard_layout in the Configuration object.
If you intend to create a widget that requires a keyboard, do not use the
virtual keyboard directly, but prefer to use the best method available on
the platform. Check the request_keyboard()
method in the Window.
If you want a specific layout when you request the keyboard, you should write something like this (from 1.8.0, numeric.json can be in the same directory as your main.py):
keyboard = Window.request_keyboard(
    self._keyboard_close, self)
if keyboard.widget:
    vkeyboard = self._keyboard.widget
    vkeyboard.layout = 'numeric.json'
- class kivy.uix.vkeyboard.VKeyboard(**kwargs)[source]
Bases:
ScatterVKeyboard is an onscreen keyboard with multitouch support. Its layout is entirely customizable and you can switch between available layouts using a button in the bottom right of the widget.
- Events:
- on_key_down: keycode, internal, modifiers
Fired when the keyboard received a key down event (key press).
- on_key_up: keycode, internal, modifiers
Fired when the keyboard received a key up event (key release).
- available_layouts
Dictionary of all available layouts. Keys are the layout ID, and the value is the JSON (translated into a Python object).
available_layoutsis aDictPropertyand defaults to {}.
- background
Filename of the background image.
backgroundis aStringPropertyand defaults toatlas://data/images/defaulttheme/vkeyboard_background.
- background_border
Background image border. Used for controlling the
borderproperty of the background.background_borderis aListPropertyand defaults to [16, 16, 16, 16]
- background_color
Background color, in the format (r, g, b, a). If a background is set, the color will be combined with the background texture.
background_coloris aColorPropertyand defaults to [1, 1, 1, 1].Changed in version 2.0.0: Changed from
ListPropertytoColorProperty.
- background_disabled
Filename of the background image when the vkeyboard is disabled.
Added in version 1.8.0.
background_disabledis aStringPropertyand defaults toatlas://data/images/defaulttheme/vkeyboard__disabled_background.
- callback
Callback can be set to a function that will be called if the VKeyboard is closed by the user.
targetis anObjectPropertyinstance and defaults to None.
- collide_margin(x, y)[source]
Do a collision test, and return True if the (x, y) is inside the vkeyboard margin.
- docked
Indicate whether the VKeyboard is docked on the screen or not. If you change it, you must manually call
setup_mode()otherwise it will have no impact. If the VKeyboard is created by the Window, the docked mode will be automatically set by the configuration, using the keyboard_mode token in [kivy] section.dockedis aBooleanPropertyand defaults to False.
- font_size
font_size, specifies the size of the text on the virtual keyboard keys. It should be kept within limits to ensure the text does not extend beyond the bounds of the key or become too small to read.
Added in version 1.10.0.
font_sizeis aNumericPropertyand defaults to 20.
- key_background_color
Key background color, in the format (r, g, b, a). If a key background is set, the color will be combined with the key background texture.
key_background_coloris aColorPropertyand defaults to [1, 1, 1, 1].Changed in version 2.0.0: Changed from
ListPropertytoColorProperty.
- key_background_down
Filename of the key background image for use when a touch is active on the widget.
key_background_downis aStringPropertyand defaults toatlas://data/images/defaulttheme/vkeyboard_key_down.
- key_background_normal
Filename of the key background image for use when no touches are active on the widget.
key_background_normalis aStringPropertyand defaults toatlas://data/images/defaulttheme/vkeyboard_key_normal.
- key_border
Key image border. Used for controlling the
borderproperty of the key.key_borderis aListPropertyand defaults to [16, 16, 16, 16]
- key_disabled_background_normal
Filename of the key background image for use when no touches are active on the widget and vkeyboard is disabled.
Added in version 1.8.0.
key_disabled_background_normalis aStringPropertyand defaults toatlas://data/images/defaulttheme/vkeyboard_disabled_key_normal.
- key_margin
Key margin, used to create space between keys. The margin is composed of four values, in pixels:
key_margin = [top, right, bottom, left]
key_marginis aListPropertyand defaults to [2, 2, 2, 2]
- layout
Layout to use for the VKeyboard. By default, it will be the layout set in the configuration, according to the keyboard_layout in [kivy] section.
Changed in version 1.8.0: If layout is a .json filename, it will loaded and added to the available_layouts.
layoutis aStringPropertyand defaults to None.
- layout_path
Path from which layouts are read.
layoutis aStringPropertyand defaults to<kivy_data_dir>/keyboards/
- margin_hint
Margin hint, used as spacing between keyboard background and keys content. The margin is composed of four values, between 0 and 1:
margin_hint = [top, right, bottom, left]
The margin hints will be multiplied by width and height, according to their position.
margin_hintis aListPropertyand defaults to [.05, .06, .05, .06]
- on_touch_down(touch)[source]
Receive a touch down event.
- Parameters:
- touch:
MotionEventclass Touch received. The touch is in parent coordinates. See
relativelayoutfor a discussion on coordinate systems.
- touch:
- Returns:
bool If True, the dispatching of the touch event will stop. If False, the event will continue to be dispatched to the rest of the widget tree.
- on_touch_up(touch)[source]
Receive a touch up event. The touch is in parent coordinates.
See
on_touch_down()for more information.
- refresh(force=False)[source]
(internal) Recreate the entire widget and graphics according to the selected layout.
- setup_mode(*largs)[source]
Call this method when you want to readjust the keyboard according to options:
dockedor not, with attachedtargetor not:If
dockedis True, it will callsetup_mode_dock()If
dockedis False, it will callsetup_mode_free()
Feel free to overload these methods to create new positioning behavior.
- setup_mode_dock(*largs)[source]
Setup the keyboard in docked mode.
Dock mode will reset the rotation, disable translation, rotation and scale. Scale and position will be automatically adjusted to attach the keyboard to the bottom of the screen.
Note
Don’t call this method directly, use
setup_mode()instead.
- setup_mode_free()[source]
Setup the keyboard in free mode.
Free mode is designed to let the user control the position and orientation of the keyboard. The only real usage is for a multiuser environment, but you might found other ways to use it. If a
targetis set, it will place the vkeyboard under the target.Note
Don’t call this method directly, use
setup_mode()instead.
- target
Target widget associated with the VKeyboard. If set, it will be used to send keyboard events. If the VKeyboard mode is “free”, it will also be used to set the initial position.
targetis anObjectPropertyinstance and defaults to None.